반응형
Ex07FrameLayout
안드로이드 네이티브 앱 개발 수업 예제#7
주요코드
FrameLayout 배치 특징 알아보기
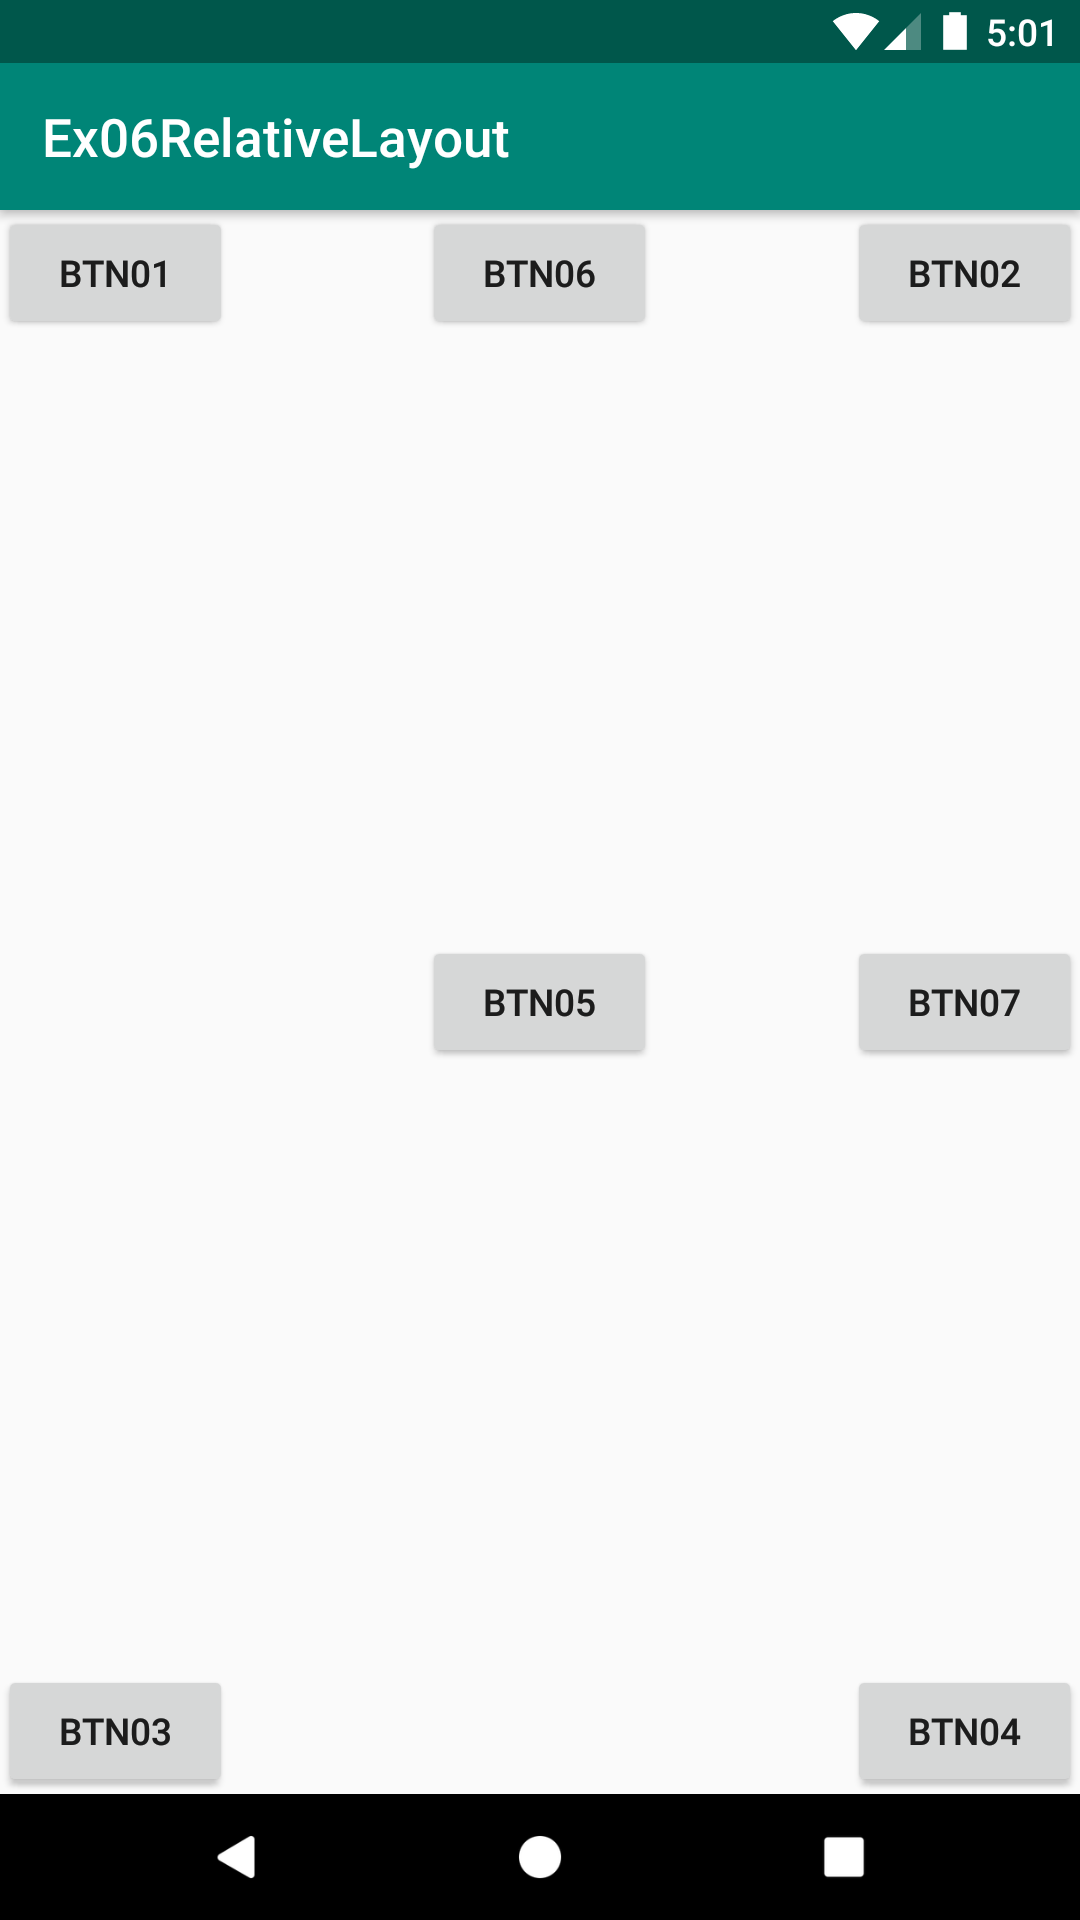
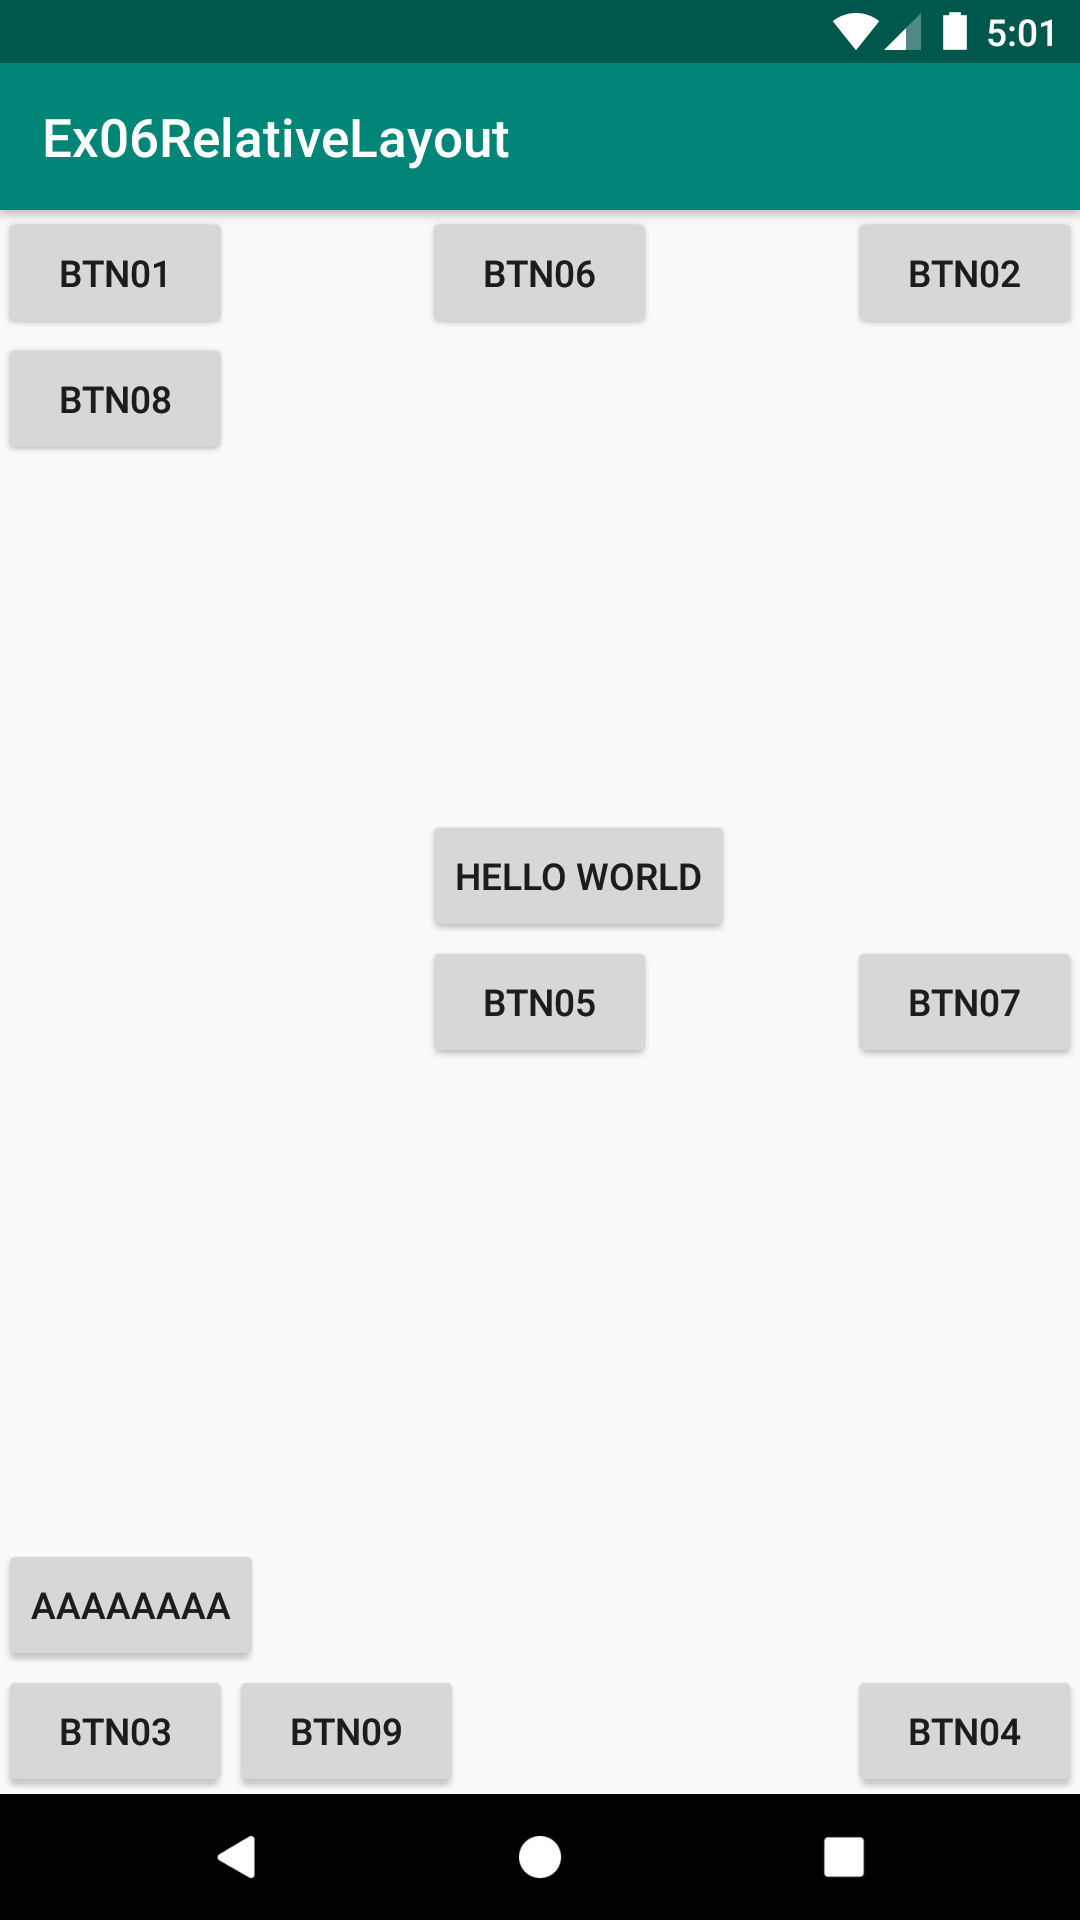
- res폴더>>layout폴더안에 있는 activity_main.xml문서를 수정하여 화면제작
- FrameLayout안에 배치된 자식뷰들은 기본적으로 좌상단에 겹쳐서 배치됨
- 버튼을 클릭할 때 마다 화면이 전환되는 Tab과 비슷한 동작으로 FrameLayout으로 구현해보기
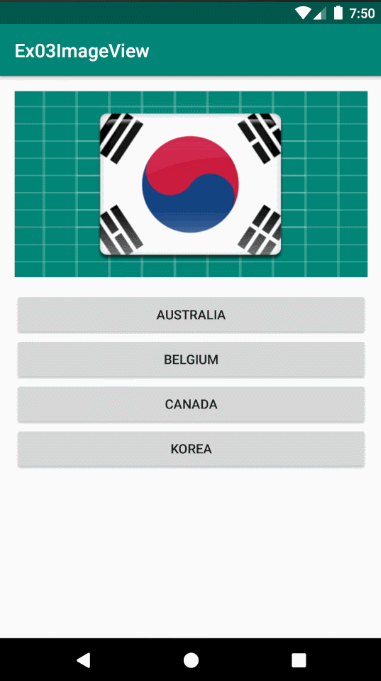
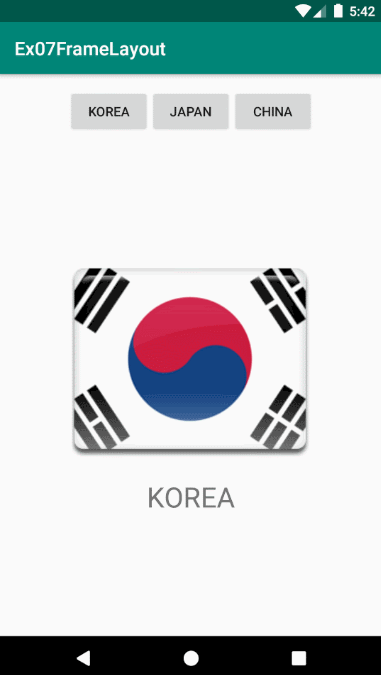
실행모습
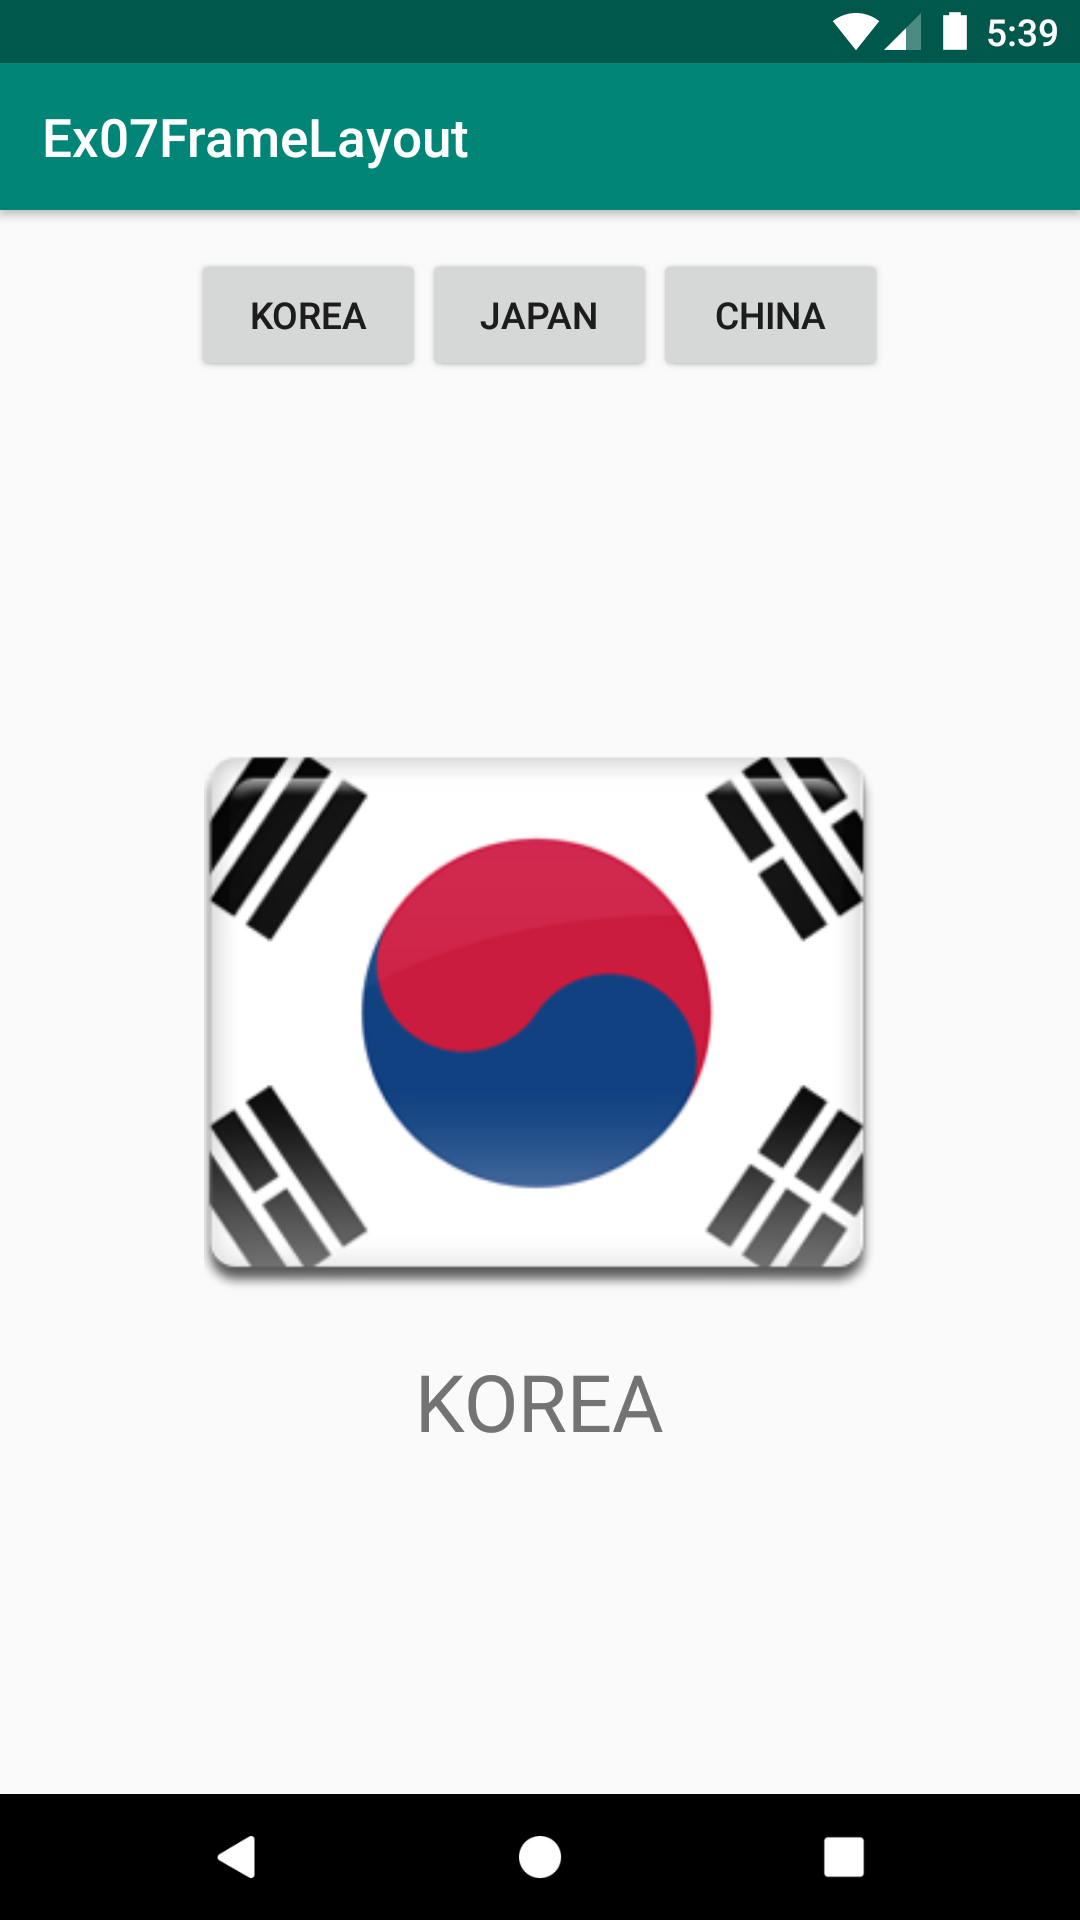
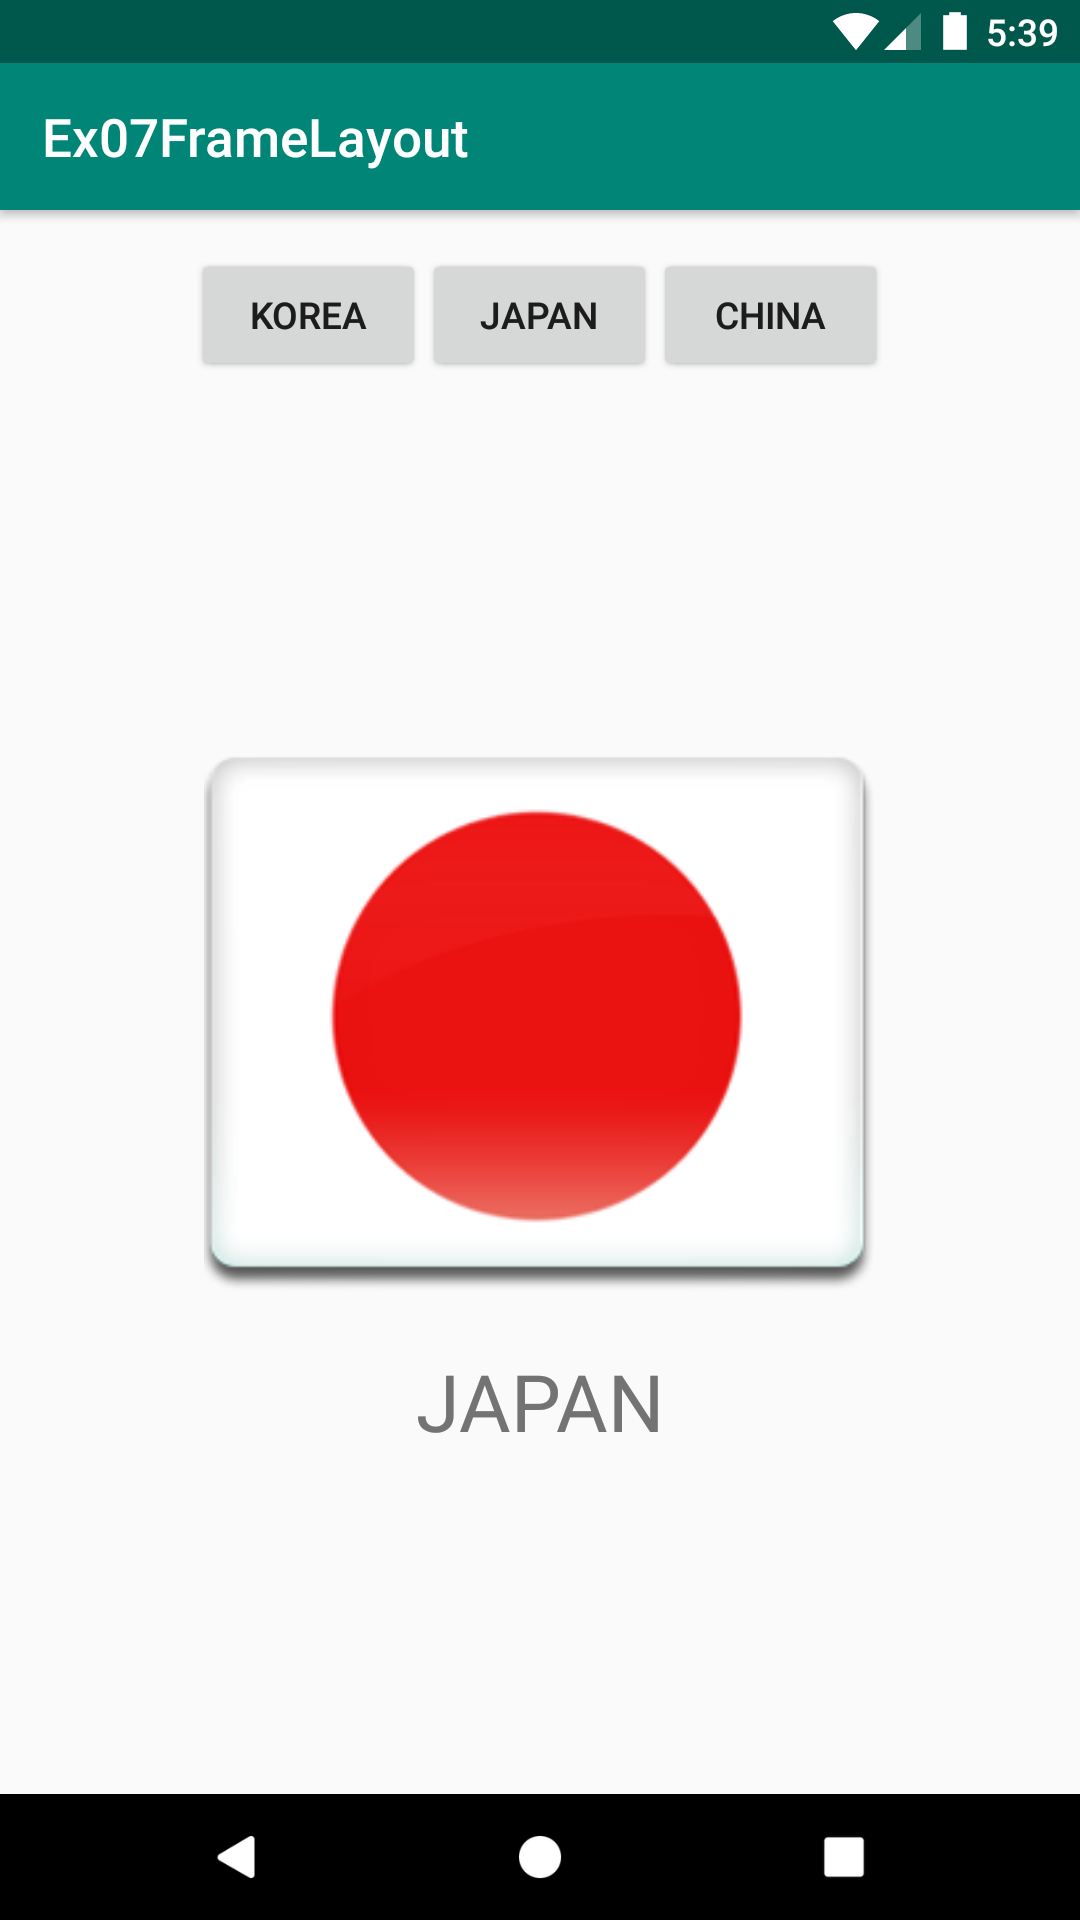
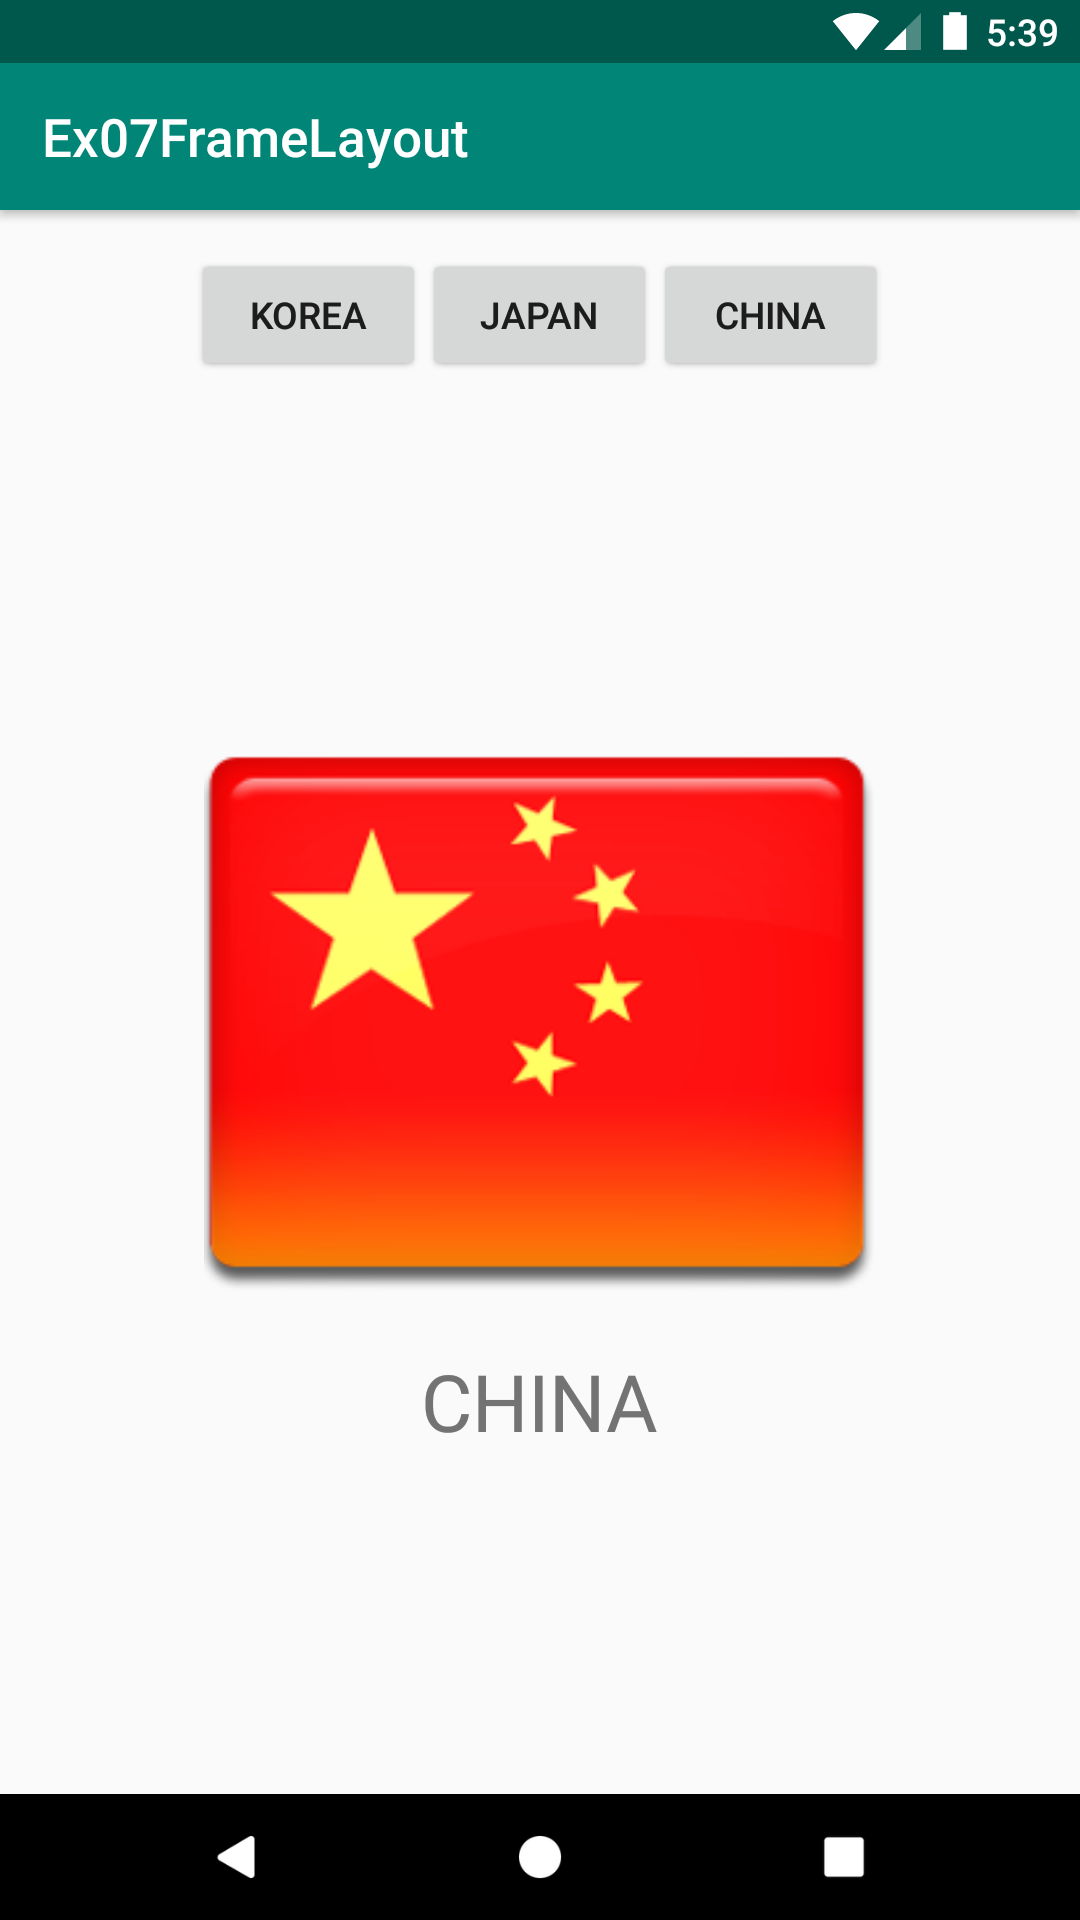
실행모습 GIF
소스코드
| # activity_main.xml |
<?xml version="1.0" encoding="utf-8"?>
<LinearLayout xmlns:android="http://schemas.android.com/apk/res/android"
    xmlns:app="http://schemas.android.com/apk/res-auto"
    xmlns:tools="http://schemas.android.com/tools"
    android:layout_width="match_parent"
    android:layout_height="match_parent"
    android:orientation="vertical"
    android:padding="16dp"
    tools:context=".MainActivity">

    <!-- 아래 FrameLayout이 보여주는 자식뷰들을 변경하기 위한 버튼들 수평 배치 -->
    <LinearLayout
        android:layout_width="match_parent"
        android:layout_height="wrap_content"
        android:orientation="horizontal"
        android:gravity="center">

        <Button
            android:id="@+id/btn01"
            android:layout_width="wrap_content"
            android:layout_height="wrap_content"
            android:text="korea"
            android:onClick="clickBtn"/>
        <Button
            android:id="@+id/btn02"
            android:layout_width="wrap_content"
            android:layout_height="wrap_content"
            android:text="japan"
            android:onClick="clickBtn"/>
        <Button
            android:id="@+id/btn03"
            android:layout_width="wrap_content"
            android:layout_height="wrap_content"
            android:text="china"
            android:onClick="clickBtn"/>

    </LinearLayout>

    <!-- FramLayout안에 놓여진 뷰들은 기본적으로 겹쳐짐 -->
    <!-- 특별한 기능 없이 뷰들을 좌상단에 배치함-->
    <!-- 이 예제에서는 자식뷰로 LineaerLayout 3개을 가지면 자식뷰의 사이즈가 match_parent 여서 좌상단 배치처럼 보이지 않는 것임-->
    <!-- RelativeLayout의 전신이며 지금도 TabWidget등에서 그 필요성이 있음. 하지만 대부분은 RelativeLayout을 더 선호하여 사용함 -->
    <FrameLayout
        android:layout_width="match_parent"
        android:layout_height="match_parent">

        <!-- 태극기이미지와 글씨를 가진 자식뷰 1 -->
        <LinearLayout
            android:id="@+id/layout_korea"
            android:layout_width="match_parent"
            android:layout_height="match_parent"
            android:gravity="center"
            android:orientation="vertical">

            <ImageView
                android:layout_width="wrap_content"
                android:layout_height="wrap_content"
                android:src="@drawable/korea"/>
            <TextView
                android:layout_width="wrap_content"
                android:layout_height="wrap_content"
                android:text="KOREA"
                android:textSize="30sp"/>

        </LinearLayout>

        <!-- 일본국기이미지와 글씨를 가진 자식뷰 2 -->
        <!-- 기본적으로 FrameLayout안에서는 나중에 작성한 뷰가 위에 배치되어 태극기가 가려져야 하지만 이 LinearLayout에 visibility="gone"속성을 줘서 현재 보이지 않도록 되어 있음 -->
        <LinearLayout
            android:id="@+id/layout_japan"
            android:layout_width="match_parent"
            android:layout_height="match_parent"
            android:gravity="center"
            android:orientation="vertical"
            android:visibility="gone">

            <ImageView
                android:layout_width="wrap_content"
                android:layout_height="wrap_content"
                android:src="@drawable/japan"/>
            <TextView
                android:layout_width="wrap_content"
                android:layout_height="wrap_content"
                android:text="JAPAN"
                android:textSize="30sp"/>

        </LinearLayout>

        <!-- 중국국기이미지와 글씨를 가진 자식뷰 3 -->
        <!-- 기본적으로 FrameLayout안에서는 나중에 작성한 뷰가 위에 배치되어 태극기가 가려져야 하지만 이 LinearLayout에 visibility="gone"속성을 줘서 현재 보이지 않도록 되어 있음 -->
        <LinearLayout
            android:id="@+id/layout_china"
            android:layout_width="match_parent"
            android:layout_height="match_parent"
            android:gravity="center"
            android:orientation="vertical"
            android:visibility="gone">

            <ImageView
                android:layout_width="wrap_content"
                android:layout_height="wrap_content"
                android:src="@drawable/china"/>
            <TextView
                android:layout_width="wrap_content"
                android:layout_height="wrap_content"
                android:text="CHINA"
                android:textSize="30sp"/>

        </LinearLayout>

    </FrameLayout>

</LinearLayout>
| # MainActivity.java |
import android.support.v7.app.AppCompatActivity;
import android.os.Bundle;
import android.view.View;
import android.widget.LinearLayout;

public class MainActivity extends AppCompatActivity {

    LinearLayout layoutKorea;
    LinearLayout layoutJapan;
    LinearLayout layoutChina;

    @Override
    protected void onCreate(Bundle savedInstanceState) {
        super.onCreate(savedInstanceState);
        setContentView(R.layout.activity_main);

        //FrmaeLayout안에 있는 자식뷰들 3개를 참조해오기
        layoutKorea= findViewById(R.id.layout_korea);
        layoutJapan= findViewById(R.id.layout_japan);
        layoutChina= findViewById(R.id.layout_china);
    }

    // 버튼들 중 하나를 클릭하였을 때 자동으로 실행되는 콜백메소드 ( 버튼들에 onclick속성으로 지정된 메소드 )
    public void clickBtn(View v){

        // 우선 3개의 자식뷰들을 모두 보이지 않도록 하고..
        layoutKorea.setVisibility(View.GONE);
        layoutJapan.setVisibility(View.GONE);
        layoutChina.setVisibility(View.GONE);

        switch ( v.getId() ){
            case R.id.btn01: // KOREA 버튼을 클릭하였을 때 첫번째 자식뷰(태극기이미지와 KOREA글씨) 보이기
                layoutKorea.setVisibility(View.VISIBLE);
                break;

            case R.id.btn02: // JAPAN 버튼을 클릭하였을 때 두번째 자식뷰(일본국기이미지와 JAPAN글씨) 보이기
                layoutJapan.setVisibility(View.VISIBLE);
                break;

            case R.id.btn03: // CHINA 버튼을 클릭하였을 때 세번째 자식뷰(중국국기이미지와 CHINA글씨) 보이기
                layoutChina.setVisibility(View.VISIBLE);
                break;
        }
    }

}
반응형