
반응형
Ex06RelativeLayout
안드로이드 네이티브 앱 개발 수업 예제#6
주요코드
RelativeLayout 알아보기
- LinearLayout은 자식뷰들이 서로 겹쳐있을 수 없으나 RelativeLayout안에서는 자식뷰들이 겹쳐서 배치될 수 있음
- res폴더>>layout폴더안에 있는 activity_main.xml문서를 수정하여 화면제작
- RelativeLayout의 자식뷰들 배치에 대해 실습
- 부모뷰(RelativeLayout)를 기준으로 한 배치 : layout_alingParentXXX
- 특정뷰를 기준으로 한 상대적인(Relative) 배치
- 겹쳐서 배치할 때 주의할 점
- 기본적으로는 나중에 배치된 것이 위에 놓여져서 먼저 배치된 뷰가 가려져야 하지만 click이 가능한 뷰가 우선시 되어 위에 배치될 수 있음
- Button은 마크업순서와 상관없이 기본적으로 다른 뷰들 보다 먼저 배치됨. (당연히 같은 Button끼리는 나중에 작성한 Button이 위에 배치됨)
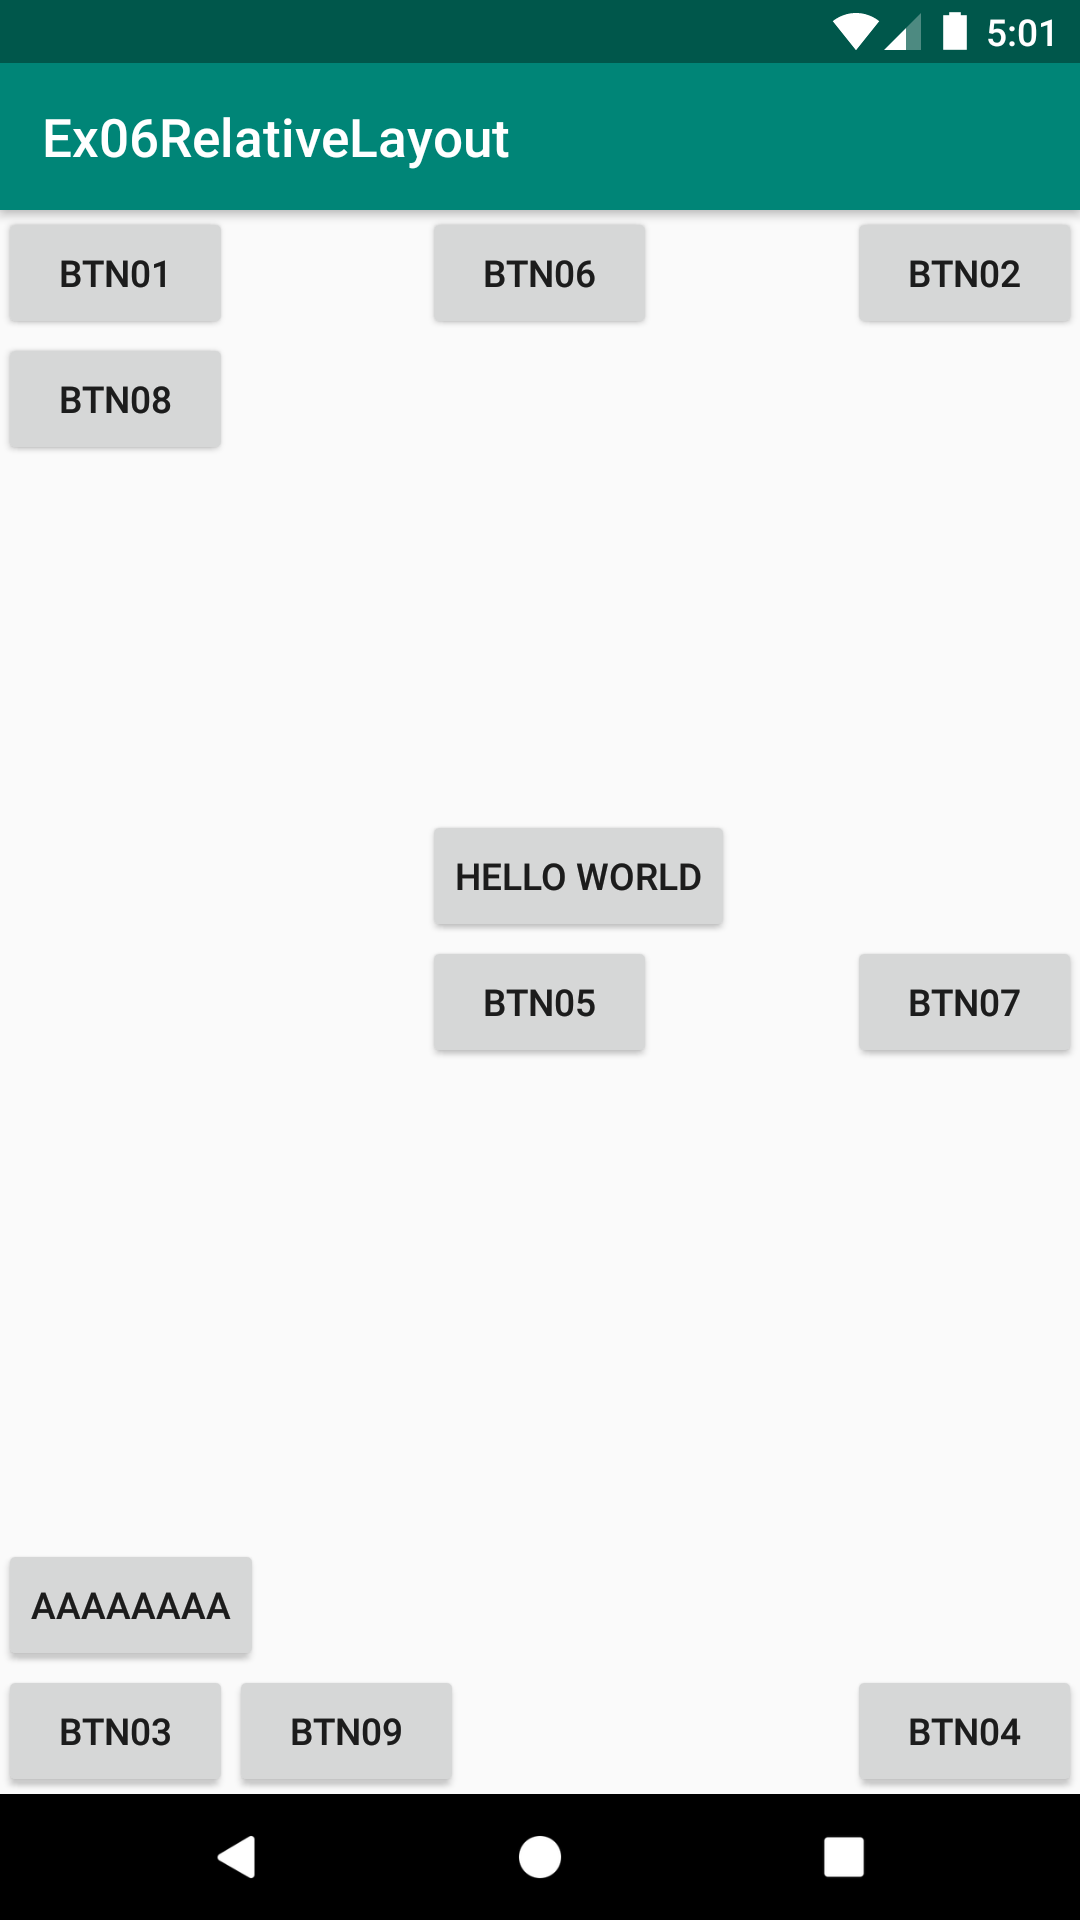
실행모습


소스코드
| # activity_main.xml |
<?xml version="1.0" encoding="utf-8"?>
<RelativeLayout xmlns:android="http://schemas.android.com/apk/res/android"
    xmlns:app="http://schemas.android.com/apk/res-auto"
    xmlns:tools="http://schemas.android.com/tools"
    android:layout_width="match_parent"
    android:layout_height="match_parent"
    tools:context=".MainActivity">

    <!-- 기본 배치 : 좌상단 -->
    <Button
        android:id="@+id/btn01"
        android:layout_width="wrap_content"
        android:layout_height="wrap_content"
        android:text="btn01"/>

    <!--1) 부모뷰를 기준으로 한 배치 : alignParentXXX -->
    <!-- 부모뷰(RelativeLayout) 우측 상단 배치 : alignParentRight -->
    <Button
        android:id="@+id/btn02"
        android:layout_width="wrap_content"
        android:layout_height="wrap_content"
        android:text="btn02"
        android:layout_alignParentRight="true"/>

    <!-- 부모뷰(RelativeLayout) 좌측 하단 배치 : layout_alignParentBottom -->
    <Button
        android:id="@+id/btn03"
        android:layout_width="wrap_content"
        android:layout_height="wrap_content"
        android:text="btn03"
        android:layout_alignParentBottom="true"/>

    <!-- 부모뷰(RelativeLayout) 우측 하단 배치 : layout_alignParentBottom, layout_alignParentRight -->
    <Button
        android:id="@+id/btn04"
        android:layout_width="wrap_content"
        android:layout_height="wrap_content"
        android:text="btn04"
        android:layout_alignParentBottom="true"
        android:layout_alignParentRight="true"/>

    <!-- 부모뷰(RelativeLayout) 가운데 배치 : layout_centerInParent -->
    <Button
        android:id="@+id/btn05"
        android:layout_width="wrap_content"
        android:layout_height="wrap_content"
        android:text="btn05"
        android:layout_centerInParent="true"/>

    <!-- 부모뷰(RelativeLayout) 가로축(수평) 가운데 배치 : layout_centerHorizontal -->
    <Button
        android:id="@+id/btn06"
        android:layout_width="wrap_content"
        android:layout_height="wrap_content"
        android:text="btn06"
        android:layout_centerHorizontal="true"/>

    <!-- 부모뷰(RelativeLayout) 세로축(수직) 가운데 배치 & 우축정렬 : layout_centerVertical, layout_alignParentRight -->
    <Button
        android:id="@+id/btn07"
        android:layout_width="wrap_content"
        android:layout_height="wrap_content"
        android:text="btn07"
        android:layout_centerVertical="true"
        android:layout_alignParentRight="true"/>


    <!--2) 특정 뷰를 기준으로 한 상대적인(Relative) 배치-->
    <!-- 특정 뷰(id="btn01")를 기준으로 상대적인 (Relative) 배치 - 특정뷰 아래쪽배치 : layout_below -->
    <Button
        android:id="@+id/btn08"
        android:layout_width="wrap_content"
        android:layout_height="wrap_content"
        android:text="btn08"
        android:layout_below="@id/btn01"/>

    <!--아래에 있는 btn09번부터하고 작성 - because, @id, @+id의 차이를 알아보기위해-->
    <Button
        android:layout_width="wrap_content"
        android:layout_height="wrap_content"
        android:text="aaaaaaaa"
        android:layout_above="@+id/btn09"/>

    <!-- 특정 뷰(id="btn03")를 기준으로 상대적인 (Relative) 배치 - 특정뷰의 왼쪽배치 : layout_toRightOf & 부모뷰 하단 배치 : layout_alignParentBottom -->
    <Button
        android:id="@+id/btn09"
        android:layout_width="wrap_content"
        android:layout_height="wrap_content"
        android:text="btn09"
        android:layout_toRightOf="@id/btn03"
        android:layout_alignParentBottom="true"/>

    <!-- 특정 뷰(id="btn05")를 기준으로 상대적인 (Relative) 배치 - 특정뷰 위 배치 및 왼쪽시작 위치 맞추기 : layout_above &  layout_alignLeft -->
    <Button
        android:id="@+id/btn10"
        android:layout_width="wrap_content"
        android:layout_height="wrap_content"
        android:text="Hello world"
        android:layout_above="@id/btn05"
        android:layout_alignLeft="@id/btn05"/>


    <!-- 3) 겹쳐서 배치할 때 특이점-->
    <!-- 나중에 만든 뷰가 기존 뷰들을 덮어야 하지만 Button은 항상 최우선이 됨-->

    <!--이미지뷰가 LinearLayout보다 ...먼저 있으면 아래.. 나중에 있으면 위에.. 보이게 됨.-->
    <ImageView
        android:layout_width="wrap_content"
        android:layout_height="wrap_content"
        android:src="@mipmap/ic_launcher"
        android:layout_centerVertical="true"/>

    <!-- 나중에 만든 뷰가 기존 뷰들을 덮어야 하지만 Button은 항상 최우선이 됨 : btn05버튼이 이 LineaerLayout보다 위에 있음.-->
    <!--LinearLayout안에 있는 Button도 가려짐.-->
    <LinearLayout
        android:id="@+id/layout"
        android:layout_width="200dp"
        android:layout_height="200dp"
        android:background="#ff0000"
        android:orientation="horizontal"
        android:layout_centerVertical="true">

        <ImageView
            android:layout_width="wrap_content"
            android:layout_height="wrap_content"
            android:src="@drawable/ic_launcher_foreground"
            android:clickable="true"/>

        <Button
            android:layout_width="wrap_content"
            android:layout_height="wrap_content"
            android:text="nice"/>

    </LinearLayout>

    <!--이미지뷰가 나중에 있으면 위에 보이게 됨.-->
    <ImageView
        android:layout_width="wrap_content"
        android:layout_height="wrap_content"
        android:src="@mipmap/ic_launcher"
        android:layout_centerVertical="true"/>

</RelativeLayout>
반응형